• Skip to primary navigation
  • Skip to main content
  • Skip to primary sidebar

Work Plaza 1

Work Online: Acquire the skills

  • About
  • Blog, How to Start a Blog
    • Steps to Writing an E-book using Microsoft Word
    • How to Work on Fiverr
    • How to make a Free E-book Cover using Powerpoint
    • Amazing Tools for Writing an E-book
    • How to Write and Sell an Ebook on kindle
  • Tutorials
    • Facts about Branded Products like T’shirts
    • How to find Blog Niche Ideas in 2024
    • 8 Cool Tools for Finding Long Tail Keywords
    • Steps to Writing an E-book using Microsoft Word
    • VIDEO MARKETING ON YOUTUBE [1]
  • How to start a blog
    • HOW TO START A BLOG IF YOU DO NOT HAVE A NICHE
    • The difference between a Domain and Web Hosting
    • How to search for a Domain Name
  • Courses
    • Wealthy Affiliate Tips
      • Free Starter Affiliate Programme Explained
      • Jaaxy Keyword Tool Review
      • How to start Affiliate Marketing for Beginners
    • Workplaza1 Academy
      • Image Strategies
      • Beginners
  • Site Info
    • Privacy Policy
    • Image Strategies
    • Disclosure
Home » Archives for Irene » Page 2

Irene

Website Structure and SEO – A Useful Guide

December 1, 2020 By Irene

Website structure 

Website structure – what does it mean?  It means the way to arrange the following elements on your website to make them found by the search engines and improve the site’s rankings:

  •  pages,
  • menu,
  • categories,
  • content,
  • images,
  • headings and sub-headings,
  • link etc.

It is part of what you should be thinking about as you design your site and write your content and this will bring about a good site structure.    This will enable better user experience and high ranking for the site.

Website Structure and SEO

Website structure planning 

Planning your website structure is good for SEO.  It ensures that everything is arranged in a hierarchy.  It helps Google crawlers or bots to crawl and navigate the site.

Just like an organisational structure, plan the structure of your website.  For example, at the top will be your home page.  The next will be your category pages and then the post pages.  For example, if you are writing on students categories on the site will be students, males, females, and posts will be male dormitories, sports, clothes, and the same for the  females, though they will come under the different categories as indicated in the image below:

Headings and sub-headings should have the appropriate sizes and written with keywords accordingly.

There is a need to understand how you will like your content to be structured.  Visualise it as you write your posts and correct those you have done already.   Group them in a hierarchy according to the headings and subheadings,  and separate the posts  into various categories.  This is also called a silo structure.

Website structure diagram

Website Structure Diagram

Few categories should be used for ease of navigation and to be easy to locate.  The idea is to add a new page to existing categories or add new categories created with its attendant new pages. Ensure that your posts and pages are consistently, rather than randomly linked.  Site links naturally occur in SERPs when your site structure is good or strong.

Internal Linking and SEO

Related to good site structure is internal linking of blog posts.  This means that for one category namely students, you can answer all search queries through your posts on classrooms, class period, or subjects.  Then you interlink the posts together.  This is known as internal linking.  This shows the search engines that your topics are related when looking at the whole content of the website, and articles.

The URL structure of a website 

A good site structure also affects the URL structure of the site.  When you register for a domain, the resulting URL is just the first step.  When you create menus, categories, and posts, these are added to the URL in the search results.  This is done in the WordPress dashboard under settings < permalinks

The URL of a post will be https://www.abc.com/students/males  where students are the category and males is the postname or title.

You will agree with me that all this shows how categories and posts are arranged for one to follow the other in a logical manner.   Just imagine what will happen if this is left out or done haphazardly; Google will not understand what the site is about, making it difficult to rank.

The usual practice is to remove stop words like ‘, the’, ‘or’, ‘a’,   ‘and’ etc. to keep the post title simple, short, and understandable to readers.  You can do that by editing it right under the post title in the WordPress editor as indicated in the image below.

Post name image
Post name image

The Role of Tags in WordPress

WordPress Tags help group posts that are similar in detail.  Tags can be found below a post, as in the image below:

"<yoastmark

Tags are added to a post by typing them in the add new tag box,  on the right side of the post editor.  Several tags can be added to a post based on existing posts, though not every post will have a unique tag.  It is normal to group several posts with a few tags.

The difference between categories and tags is that categories are generally used to group related posts together.  There can also be sub-categories of the main categories;  whilst tags are like an index of words on your site.  Tags help posts and categories to be found by the search engines.

The XML Sitemap

An XML site map also helps Google crawlers go through the content on your site.  It is one of the first things to install either through a plugin or through the Yoast SEO plugin.  A new site with few pages of content benefits from a sitemap in that, Google crawlers crawl a Sitemap and index it whether the content is a lot or not.  An XML Sitemap is not meant to be seen by people whilst an HTML sitemap is both hidden but can be searched for.

If you are using the Yoast SEO plugin, go to  Yoast<SEO<General Page Features tab and scroll down to ‘XML Sitemap’ select it.  Alternatively, use a sitemap plugin obtained from the WordPress plugins folder for the purpose.

Now you know what steps to take as far as your website structure is concerned, to enable it found by the search engines.  If you enjoyed this post, please leave a comment, and share it.

Filed Under: Blog, How to Start a Blog, How to start a blog Tagged With: SEO, Tags in wordpress. XML Sitemap

Jaaxy Keyword Tool Review

November 9, 2020 By Irene

Jaaxy Review


Jaaxy Keyword Tool
Jaaxy Keyword Tool

This review is on Jaaxy, a keyword tool that helps with the search and selection of keyword phrases.  Results on Jaaxy are derived from Google Bing and Yahoo.  Keyword search, selection, and their use are important for your site to get traffic and rank high in the search engines.  Using keyword research to target words and appropriate search phrases to use, is faster than manual brainstorming.  It is necessary to find website competition, which is the number of websites with the keywords you want to use.  Such competition figures can be derived from the monthly estimated volume of thousands of search results using Jaaxy. 

A keyword is a word or phrase typed into Google when making a search.  You may not have noticed but there is an intent behind any term typed into Google or other search engines  this has been categorised as 

  • Navigational – leads to a website. e.g Daily Graphic
  • Transactional – when trying to take an action.  e.g  short course review or purchase a short course
  • Informational – these can be in the form of a question. Sometimes navigational terms are also informational in nature.  e.g sofa bed – where information about a sofa bed is being sought.  


The terms you choose and use can help your post land on the first page of the search engines.  

Keywords are indispensable; as you use them at every turn namely; 

  • blog post titles, 
  • image titles
  • Inside descriptions
  • Campaign text

With this explanation of keywords, let’s now look at Jaaxy.

Review of Jaaxy keyword tool

Jaaxy is a keyword tool that is incorporated into Wealthy Affiliate Open University.  It is a tool that you can use even if you are not registered as a member or student of the school.  It is web-based so can be accessed on any device.  


How does Jaaxy work?

Type a search term into the search bar.  A list of related phrases is revealed.  Click on the desired ones to reveal more keywords.  More related terms are found on the far right of the tool under related terms.  Click ‘brainstorm’ for more terms.  Click on desired related results to reveal more results that you may not have thought of.

The results are searches being made by people in real-time that you can use in your posts, headings, subtitles, campaigns, as well as image titles.  This is one of the main reasons for doing keyword research.  Always make these searches and use the results in your posts.  Keywords are indispensable as brainstorming has limitations i.e one can think of just so much.

Since most people search with three or more words, most of the results reveal such phrases known as long-tail keywords.  With some of them, they are searched for  500 to 1000 times a month and can rank very quickly to the top of the search engine results pages. Practically, it has been found out that if you targeted words or phrases with less than 300 websites using that search term, and that brings about 100 clicks or traffic to a site, then it is a desirable phrase to use. Keyword research tools are used to find these figures known as quoted search results (QSR) or website competition.  The estimate of traffic is also determined.

Longer keywords are more specific that is why they are more likely to rank.  Some of these explanations are the result of several years of analysis on the workings of the search engines.  Once a phrase is very targeted, it surely gets ranked.

Jaaxy keyword results page


The results in Jaaxy are from Google, Bing, Yahoo, and Amazon.  On Jaaxy can be found the following estimates, some of  which you should be focusing on:


Average: average number of phrases in a month

Traffic: number of visits to a website,  if found on the first page

QSR:  Quoted Search Results – (number of websites using that term)

SEO:  based on traffic and QSR.  A higher number of 100 is desirable

KQI: Keyword Quality Indicator uses colours to show if a keyword is great, normal, or poor.


If you need an exact match domain name, the tool searches for it and lets you know its availability.  For example, when you search for  ‘free SEO training’;  and want to set up a site with that phrase, you can name your site freeseotraining.com or .net whichever Jaaxy makes available.


There’s also the alphabet soup technique incorporated into the tool, where you add the letters of the alphabets one by one before or after the keyword phrase.  For example free SEO training ‘a’ and ‘a’ free SEO training.


Site rank in Jaaxy shows you where your site ranks in Google.  It will save you from doing this manually;  that is, you manually have to check from time to time, where your site has reached in the search results. Sometimes it will be on page 2 and later move to page 1.  Sometimes it will be nowhere near the first 10 pages but after some months will move closer to the first page.  


Check here for 30 free searches on Jaaxy


You can also use keyword tools to find out about other websites in your niche.  For example, if you are in the technology niche, you can key in the website name of another tech site you know to see metrics related to their strategy. To help you improve on yours.


Inside Jaaxy, you can tick particular keywords and save them for future use.  Chosen keywords can also be exported as a .txt or .csv file. This is handy as you may not need some of the keywords.  You can even delete those you don’t need right from inside Jaaxy.  


There’s also a provision for search history, which is self-explanatory.


Jaaxy also has provisions for affiliate programmes where popular affiliate programmes are listed.  You, first of all, need to register with any of the affiliate companies you are interested in.  Inside Jaaxy affiliate programmes, you find carefully selected products that you can promote.  You can additionally, make a search inside Google for your niche plus affiliate programme, to look for more.


Jaaxy Pricing

There are various levels of the tool, namely

  • Free 30 keyword searches for starters,
  • Pro version – manual features –  $49/m
  • Enterprise version with features fully automated. $99/m

You manually check keyword results, whereas, with the Enterprise version, the results are instantly revealed.  If you have several websites and need to make quick keyword searches then you’ll need a tool like Jaaxy Enterprise which gives search results very quickly.

I use Jaaxy Lite which is part of the premium package of all premium members of Wealthy Affiliate.  I add other free options to my keyword search especially Google auto-suggest and the free Keyword Surfer options.  The thing about SEO is to understand how it works and basically, take action using your creativity and imagination as far as it can go.  Posts do rank depending on the rarity of the search terms used.  Meaning, you may be targeting keywords with zero estimates, but that will rank rather high all the same.  

If you’d like to try Jaaxy you can do that here.  This will let you determine if it’s alright for you to upgrade.  There are training videos available when you sign up for Jaaxy. 

Choose keywords based on its relevance to your post and audience and consider the competing sites or traffic that the keywords will bring to your site 


Filed Under: Blog, How to Start a Blog, Wealthy Affiliate Tips

All you need to know about WordPress Widgets

November 3, 2020 By Irene


What is a WordPress widget?

All you need to know about WordPress Widgets
All about WordPress Widgets

A WordPress widget helps visitors to find information on a website.  Widgets act as a shortcut to some of the most important content on a website


WordPress widgets vs plugins

The main difference between a plugin and a widget is that a plugin can be downloaded onto a theme to add a functionality that does not come with  WordPress;  whereas widgets are already installed in WordPress themes.  There are also defined locations for the widgets where they can just be dragged and dropped and saved, for it to function.  A widget can be found under Appearance in the WordPress dashboard.


On the other hand, a plugin can be used to create a location for a widget.  That is if you need a feature that is not included in the widgets on your blog, you can download a plugin to do that.


Even though there are numerous plugins for the very purpose required, sometimes an additional code is added to the theme to create a widget.


Plugins have a section in the dashboard.  [add image]


Wordpress plugins location
WordPress plugins location

What’s the purpose of using widgets

Without website widgets, the appearance of most websites will be very dull.  Widgets also help visitors to easily find information because of where they are placed on a website, namely the sidebar and footer.   For it to be useful, a widget must serve the purpose for which it is installed.

A list of free widgets comes with every WordPress theme. Some of the default popular widgets are

  • text widget,
  • recent post,
  • image,
  • comments, and
  • archives widgets.


Widgets in WordPress theme


Wordpress widget locations

WordPress widget locations 

They help to add additional content through text and images to either the left or right sidebar and also the footer of a website.  There are also paid widgets with additional features.  The features can be set up as and when desired.


How to place widgets in WordPress widget locations

These are a few of the widgets in my theme, found under the widgets sub-menu under the appearance section.  To assign a location to a widget, you click on it and drag it on to the chosen, for example, header right, primary or secondary sidebar, or the footer areas.  After that, click on the down arrow, to display other information on the use of that widget and also options.  When you’ve made the necessary selections, and to prevent it from not showing, click save and done.  The widget should appear in the chosen sidebar of your website.

Sometimes after installing a widget you find out that you don’t have an immediate need for it.  A provision has been made in all WordPress themes for an Inactive widget where such unused widgets can be kept till needed.


Some particular features of paid widgets are as follows:

  • Sticky and floating widget
  • Chatbot
  • Pop up
  • Animation
  • Social icons
  • Social media feed
  • Google maps
  • Video gallery
  • Image gallery
  • Widget thumbnails


A signup form and some plugins, when installed will end up in the widgets submenu.  This placement shows that some plugins are also widgets in form.

Widgets with particular features can be obtained from the WordPress Plugins Directory.


How to extend  a WordPress widget 

  • Through the use of a plugin
  • Through adding code snippets

Most widgets come with instructions or a simple guide and also an illustration on how to use them.


Now you know what a WordPress widget is and how to assign locations to them.  If you enjoyed this post, please leave a comment and share it.  Thanks


Filed Under: Blog, How to Start a Blog, How to start a blog Tagged With: Wordpress

Insights into the WordPress Dashboard

September 8, 2020 By Irene

The WordPress Dashboard

Here are insights into the WordPress Admin Dashboard, where you’ll do all your work on your website, namely adding posts and images, sharing your site, changing the theme, and much more.

Steps to log in to WordPress

Remember you’ll log in to your WordPress backend using https://www.yourwebsite.com/wp-admin.  You can at this stage change the default password given, with your own, to increase your security and make login easy.

We will be looking at the WordPress dashboard or back-end. From the menu pane on the left of the dashboard, hover over one icon after the other to reveal the sub-items.  To be found in the Dashboard Home Page is news of WordPress events, space for a quick blog post, comments, and information on some of the plugins installed.  The ones you will use frequently are found in the images listed below.


The first tab you see is the name of your website.  When you hover over it,  ‘visit site’ tab is revealed.  Toggle back and forth to the blog and back to the dashboard using those two tabs.   Additionally, you can instantly view a post, go to the visual editor, see the number of comments received, and find the Yoast plugin from this bar.    This is indicated in the image below.


Dashboard Screen

Dashboard Home (Screen) – Hover over ‘dashboard’ to reveal the sub-menus, ‘home and updates’.  Inside the homepage can be found news items from WordPress, the provision to make a draft post, and some installed plugins.  A few of already published posts on the blog can also be found here.


Wordpress Dashboard home

WordPress Dashboard home


Posts – To write a post, click on post select ‘add a new post’ to reveal the WordPress editor in visual mode.  A post can be drafted in a word doc, and edited, before copying and pasting it into the visual editor. Further enhancements like sub-heading sizes and images can be added to the post in the visual editor.  The tool for adding this and more options is the ‘kitchen sink’ plugin.


Wp posts (dashboard)

Wp posts (dashboard)


The sub-titles of posts are arranged according to sizes 1-6 in WordPress.  Apply the sizes to your sub-headings of your post.

WordPress Post Title Sizes


If you have just received your domain, you may want to know what to do after receiving your domain name.


Media

Wordpress Dashboard Media

WordPress Dashboard Media


Click ‘media’ to reveal the media library where images are stored, or Click ‘Add New’ to upload new images.


Comments

Wordpress Dashboard comments
WordPress Dashboard comments


Visitors’ comments are placed in the comments section of the backend, where they can be approved, given response, or sent to thrash.


Pages – are a bit like posts, except that in the settings you can choose to have a static home page or select posts if you want your recent post seen on visiting the site, as indicated in the image below.  In addition,  before assigning Menus to pages, Go to Menus < Manage Locations to see how many menus your theme allows.  This will help you to know the number of pages to add to your menus, as a start.


Wp Dashboard (Pages)


Page Reading Settings


Appearance

Wordpress Dashboard Appearance
WordPress Dashboard Appearance


Widgets are tools that add images and text to the sidebar, header, and footer of your website.  They are extremely useful and differs from theme to theme.

If you would rather watch a video on the WordPress dashboard, click the link https://www.youtube.com/watch?v=EXKwAk0j3k8.     


Plugin –   some plugins come with each theme.  Delete the ones you don’t need and install any plugins you desire.  You may also use those recommended below. 

Wordpress Dashboard (Plugins)
WordPress Dashboard (Plugins)


  1.  Akismet anti-spam, or  (ii) Wordfence
  2.  Gutenberg editor
  3. Display kitchen sink
  4. GDPR cookie consent
  5. Contact form
  6. Simple social icons or (ii) social warfare
  7. Sitemap by Bestwebsoft
  8. Very simple breadcrumbs
  9. Wp super cache
  10. Yoast

Features of the plugins can be found in its description.


Users – click ‘Add New’ to assign tasks to others to do on the site.

Wp dashboard (Users)


Settings

Wp Dashboard Settings


New plugins installed will be added to the settings tab.  Most of the default settings applied will be enough for your needs, but you can change some if you so wish.


Sitemap – helps bots to crawl easily for SEO purposes and also assists visitors in their search on the site.    Sitemaps also inform the search engines about new content on a blog.  Some WordPress themes provide a sitemap.  Other ways of generating an XML sitemap is through the Yoast SEO plugin or the Google XML Sitemaps plugin.

Set up the Yoast SEO Plugin

The Yoast SEO plugin helps to optimise your website to be found by the search engines;  manage your titles, meta descriptions, and targeted keywords.  To set up the Yoast plugin, use the following steps:

Go to Plugins < Add New.

Type in Yoast SEO, install, and activate it.  It appears on the left menu pane.  Click to configure it by going through the various options.

You will upload add a logo, which can be created in canva.

After writing a post, scroll down the post editor to the Yoast plugin.  In ‘focus keyword’, type in the heading of your post.

In ‘preview result‘, select ‘desktop‘.  Then click SEO and edit the snippet of the words or description that appears there.  That is what appears in Google search results when a search is made for the terms in your title.

Then click  ‘Readability’ to see your readability score, as indicated in the image below.  An excellent score will be indicated by a green colour.  Click the arrowed areas to reveal more parts of the post to be corrected.  These are a guide to help you remember that titles and descriptions are important in SEO.  Concentrate on creating awesome content and write titles that include your keywords and equally understandable to the reader.

Yoast SEO Plugin
Yoast SEO Plugin


Always remember to click ‘save draft’ after any edits you make to a post, and publish it when you are ready to do so.  This can be found on the right side of the editor.  You can also preview or publish from the same menu options.

Tip: Install the Grammarly app for making corrections to your posts.

Wordpress Dashboard 'Save Draft'
WordPress Dashboard ‘Save Draft’


How to assign menus to pages in WordPress


Before assigning categories to posts, Go to Menus < Manage Locations to see how many menus your theme allows.  This will help you to know the number of categories to add to your site, as a start.

If you have already created a post that you want to assign to a page, take the following steps,  which will differ from theme to theme:

Go to Page < Add New.  Give the page a title and paste the text in there. Click ‘save draft’ on the right side before moving on to another page.  Do this for as many pages that you have written text for.

Go to Appearance < Menus

Click ‘create a menu’.  Type in the menu name or title you have in mind and click ‘save menu’.  Do this for all the menus you have in mind.  Menus should not be too many but the titles should be revealing enough to help a visitor find what he is looking for.

How to add  Pages and Menus to WordPress

Next look for pages < add menus.  Under ‘most recent’ pages first, tick the boxes beside the pages you have already created then click ‘add to menu’. You will see that it will immediately move to the next column, where you earlier saved the menus.  Now drag each page name under the appropriate menu name; and also re-arrange the menus by drag and drop, as you want them to appear on the top of your website e.g home, about, contact or services.  On workplaza1, the menu items are About, How to start a blog, Wealthy Affiliate Tips, and Site Info.

If the menus created do not appear as expected, check menu settings to either select or de-select the options stated there.

You can alternatively add menus under Appearance < Customise < Menus by following the instructions.

How to create Categories  in WordPress

To create categories and tags for your posts,  go to categories which is a sub-item in the posts menu.  Create a new category, give it a name, and add a slug.  Select ‘parent‘ if there will be more sub-categories under this new category, or ‘none‘ if it is only related to the post.  Also, give a short description and click ‘add new category’.

Add only three to five sub-items under a category to show on the header, as Post meta, and breadcrumb settings all help to group other posts related to the ‘parent’ category.   If you are writing about children grouped into boys and girls for example, any post related to each group will be indexed under the group automatically.

How to create Creating Tags in WordPress

Tags are also added to the various groups, for example, different tags will go with,  boys’ clothing as opposed to girls’ clothing.

Categories and tags can also be created in the column on the right side of the visual editor where you write your posts.

These are some of the important settings that go with your posts.  With these insights into the WordPress Dashboard, you are ready to start with or continue writing and posting posts for your website.

Did you enjoy this post?   If you did, please leave a comment and also share it. Thank you.


Filed Under: Blog, How to Start a Blog, How to start a blog Tagged With: Blog Categories and Tags, WordPress Dashboard

Five (5) things to do after getting a Domain Name?

July 24, 2020 By Irene

After getting a domain name I am sure you are now ready to carry on with setting up your blog. and add your first five (5) pages; but first,

After getting a Domain Name

how to set up WordPress

What were your experiences when you tried setting up your website? In fact, we are going to use wordpress.ORG because that is what I use for this site, although I started with a free theme; so if you are ready to go with a paid theme you are good to go.
Buy a domain name from wordpress.ORG and host your site there or you can host it on Bluehost. A wordpress.ORG site is an investment that will also earn for you in the long run, plus other advantages.
Wordpress.org is highly recommended because it is a self-hosted blog. Once you purchase a theme that is between $50 to $100 you are free to customise by making as many changes as you want to it.
Alternatively, you can even start with a wordpress.COM site, that is if you are not yet sure. With wordpress.com you may have to purchase more tools later to customise it.

Log in to your admin panel by typing
Your website name plus wp-admin. e.g https://www.yourwebsitename.com/wp-admin.   This is what you use anytime you want to go to the dashboard of your site.
If you are using a free theme too there will be some slight differences in that you will not have to change the server to point to a host. So your website name will be www.abc.wordpress.com or www.abc.blogspot.com


Setting up a Website for Free – Bluehost

To start setting up a free website with Bluehost first, make a search in google for ‘Bluehost pricing’ and look for
‘theme pricing’ and ‘package extras’, namely, hidden costs, and other extras. Inside Bluehost, you can also get a domain name and a wordpress.ORG theme to buy.
For extras, you may only need the domain protection SSL certificate.
At the site, you will be guided step by step on how to choose a theme, first indicating what you want to use your site for, etc.
Go through the steps to choose a theme. A free theme is one of the options offered here too. Most people choose the Astra free theme, which can be changed later.

Free or Premium WordPress Themes

Below are some of the best free or premium WordPress themes:

Generate press
Theme forest
Woo-commerce
Genesis Studiopress
Elegant themes

Four features that determine a good WordPress Theme:

Look for the following theme features, which must be present in any good website template:

Mobile friendly
SEO optimised;
Niche design
Support from the developer

Follow the prompts all through and when your site is successfully uploaded you’ll receive a notice that ‘your site has been successfully installed’.

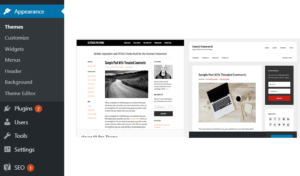
After installing your WordPress theme, go into your dashboard, using www.yourwebsite.com/wp-admin. Go to appearance < themes where you will find themes to choose from.

If you purchased a theme elsewhere and it is installed on your pc, you will find it here. Otherwise, select the theme you have purchased from your host. Click install and activate

Wordpress Themes inside dashboard
WordPress Themes inside dashboard


Next upload the theme you have purchased or a pick desirable one from the list.  If you purchased a theme elsewhere and it is installed on your pc, you should upload it here. Otherwise, select the theme you have purchased from your host. Click install and activate.

Next, go to Settings
Appearance < General
Type in a Site Title (e.g is work online)
Also, add the Tagline (e.g acquire the skills)
Save changes


Setting up a Website for Free – Wealthy Affiliate

Setting up a blog at Wealthy Affiliate is equally easy. On the left side of the timeline,
Go to Websites < Site Builder
From the options provided, indicate whether you want to
–   build a free website,
–   use a domain you own that you are importing there, or
–   register a domain.
Select one and then you choose one of the themes offered, which is immediately installed for you.
You also get
–   Hosting
–   Website development tools
–   Keyword research tool
–   Coaching and Support

Choose a theme from Wealthy Affiliatee
Choose a theme from Wealthy Affiliate

You may want to try Wealthy Affiliate as a premium member to gain all the benefits there.


How to Design your Website

If  you’d rather use the services of a website developer, show him exactly what you want. Hopefully, he should be able to use your specifications!

Customise the look of your Website

I)  Change Header – One thing you may want to do is to change the default header image of your site. It may be an image or text, or both. You can give the specifications i.e size as stated on your theme and text needed to a Graphic Designer to make some samples for you to choose from. However, you can put in the first five pages and some posts before the header is ready to be changed. Changing the header should be easy for you as it will be an image stored on your pc which you will install with the following steps:
Appearance

Header

Customise

Upload image

Save

ii)Settings < permalinks  – permalinks show how your post will appear in the browser.  It should be as indicated in the image.


Wordpress categories postname
WordPress categories postname


iii)Choose post name; click save changes


Free WordPress Plugins

A few initial plugins will have to be installed to add the necessary functionality to your site.  For SEO, either the Yoast or All in One SEO plugin is advised.  Also instal and activate a social plugins to enable sharing of posts, and a plugin that checks spam like Akismet.  Most plugins are an add on for WordPress and are free.  There are several of the same plugins to choose from.  Check the details given in the documentation to help you choose.  The best plugins are updated frequently and with time, you will know which are the best ones to use. It is not advisable to use too many plugins.

Video Tutorials

You may also wish to undertake further research on the web host you’ve chosen by listening to the relevant YouTube videos.

Why do you think you are doing all this by yourself? Everyone struggles at some level at first, but you will catch on fast once you begin to take the first steps. Most bloggers teach themselves to set up their blogs. Some learn quickly although we all start with no knowledge. If you belong to a group or community ask questions; alternatively, you could make some research on google and youtube when you get stuck.

You could also have a web developer do it for you. It’s always good to try your hands on it and to understand what you are doing explain what you want to be done by a web developer. Apart from saving yourself much-needed funds and frustration. I hope this post settles your mind on what to do after getting your domain name.

Did you enjoy this post? If you did, please leave a comment and also share it. Thank you.

Filed Under: Blog, How to Start a Blog, How to start a blog

How to Create a Privacy Policy for your Website

June 18, 2020 By Irene

How to create Privacy Policy for your website

One of the vital pages you’ll need to create is a privacy policy for your website.

Usual occurrences like writing a blog posts that attract visitors, commenting on blogs and social media, purchasing and selling on blogs, offering services, getting visitors to your blog are all ways by which visitors interact with a blog.

Other ways are when visitors’ information is entered in a contact form, through collecting email addresses using a form, or a plugin that performs that function.

Even if you are not collecting emails on your blog it is right to have the privacy policy page, as a blog processes information in so many ways.

It is a necessity put in place to protect both blog owner and visitors to the blog from lawsuits and other complaints.

In most countries worldwide, websites owners are required to have a privacy policy page. Such regulations keep coming up day in and out, making such a policy page a requirement.

What is a Privacy Policy Page?

The privacy policy page shows how a client’s data is gathered, used, disclosed and managed on a site.

Why the need for a privacy policy?

  • It shows your authenticity
  • It is the right thing to do
  • Other third-party sites you use, are also using such policies; and require it for them
  • to be able to work with you
  • Creates transparency between the visitor and yourself
  • Reveals any references to children in the blog

Disclosures

Disclaimers are the are legal requirements in a blog post that make the intentions of the blog or post transparent

to the visitor; for example,

  • Where you earn a commission should your visitor click a link and make a purchase
  • Where you get paid or receive compensation from blog posts


Disclaimers

The disclaimers information on a blog relates to any content that you will not want to be held responsible for.

For example, in cases of adverse effect or failure to achieve expectations as a result of taking advise from the blog.

This can be a paragraph or sentence in a blog post with a link to the disclaimers page.

Such laws, though unwritten, is implied in some offline day to day transactions.

Private Policy Statement Template

Creating a privacy policy statement is not difficult these days. Free templates, sample privacy policy and blog privacy generators are available online. You can write your own privacy policy by copying from a sample template and making changes to it, by adding your website url, contact address etc. where necessary. In addition, study the privacy policies of other websites in your niche and see what you can use from it to create your own.

You can alternatively hire a lawyer to write one for you. Or you can purchase an already written template bundle for your use.

All three statements can be written on a single page.

Depending on the needs of your website, other pages to create for your website in addition to the privacy policy, are Terms of Use and Frequently Asked Questions pages.

Did you enjoy this post.  If you did, please comment and share it.  Thank you


Filed Under: Blog, How to Start a Blog, How to start a blog Tagged With: privacy policy page, start a blog

  • « Go to Previous Page
  • Go to page 1
  • Go to page 2
  • Go to page 3
  • Go to page 4
  • Interim pages omitted …
  • Go to page 6
  • Go to Next Page »

Primary Sidebar

Copyright © 2025 · Irene Anum 2 On Genesis Framework · WordPress · Log in

This website uses cookies to improve your experience. We'll assume you're ok with this, but you can opt-out if you wish. Cookie settingsACCEPT
Privacy & Cookies Policy

Privacy Overview

This website uses cookies to improve your experience while you navigate through the website. Out of these cookies, the cookies that are categorized as necessary are stored on your browser as they are essential for the working of basic functionalities of the website. We also use third-party cookies that help us analyze and understand how you use this website. These cookies will be stored in your browser only with your consent. You also have the option to opt-out of these cookies. But opting out of some of these cookies may have an effect on your browsing experience.
Necessary
Always Enabled
Necessary cookies are absolutely essential for the website to function properly. This category only includes cookies that ensures basic functionalities and security features of the website. These cookies do not store any personal information.
Non-necessary
Any cookies that may not be particularly necessary for the website to function and is used specifically to collect user personal data via analytics, ads, other embedded contents are termed as non-necessary cookies. It is mandatory to procure user consent prior to running these cookies on your website.
SAVE & ACCEPT